You’re finally in warm, sunny Florida after braving the shallows of Lockwoods Folly, Mud River, and other hazards. Now it’s time to relax, you think. If you continue down the ICW to Miami, you will find that Florida really must like lift bridges, they have so many of them. Between Hobe Sound and Ft Lauderdale, there are 27 bridges that must be raised for sailboats and even some for powerboats, depending upon their height. In Florida, unlike other states, the bridge lift schedules are set for a boat maintaining 7 kts. If you can keep a 7 kt speed, you can usually make every bridge without waiting. However, the wildcard in that equation is current which can run up to 1.5 kts (against and in favor) and how the bridge operator feels about lifting on time. If you lose 5 minutes waiting for the operator to lift the bridge, you may very well not make the next bridge if your maximum speed is 7 kts.
In the past, I planned my route with a waypoint placed at every bridge so I could look at the waypoint list in my Garmin chartplotter and keep track of my arrival times. I would either speed up a little (I’m a sailboat after all) or slow down so I would arrive at a bridge without waiting. Doing donuts with a sailboat in a narrow channel is not fun nor safe, especially with other waiting boats, current, and wind.
Route Explorer to the rescue – Automatic Bridge ETAs
Wouldn’t it be nice if there was a feature that kept track of expected arrival times (ETAs) automatically for bridges? Just enter a route and the app or chartplotter would do the rest, constantly adjusting bridge ETAs for your current boat speed. Aqua Map saw the need and responded with a feature called Route Explorer. Just make sure your route goes through the center of each bridge and Route Explorer does the rest. In fact, Route Explorer not only keeps track of bridge ETAs but also upcoming hazards, marinas, and even finds the lowest fuel price along your route! Let’s look at a sample route, it’s through the heart of bridge country in Florida along the ICW. First, let’s look at the overall screen information before getting into Route Explorer details.
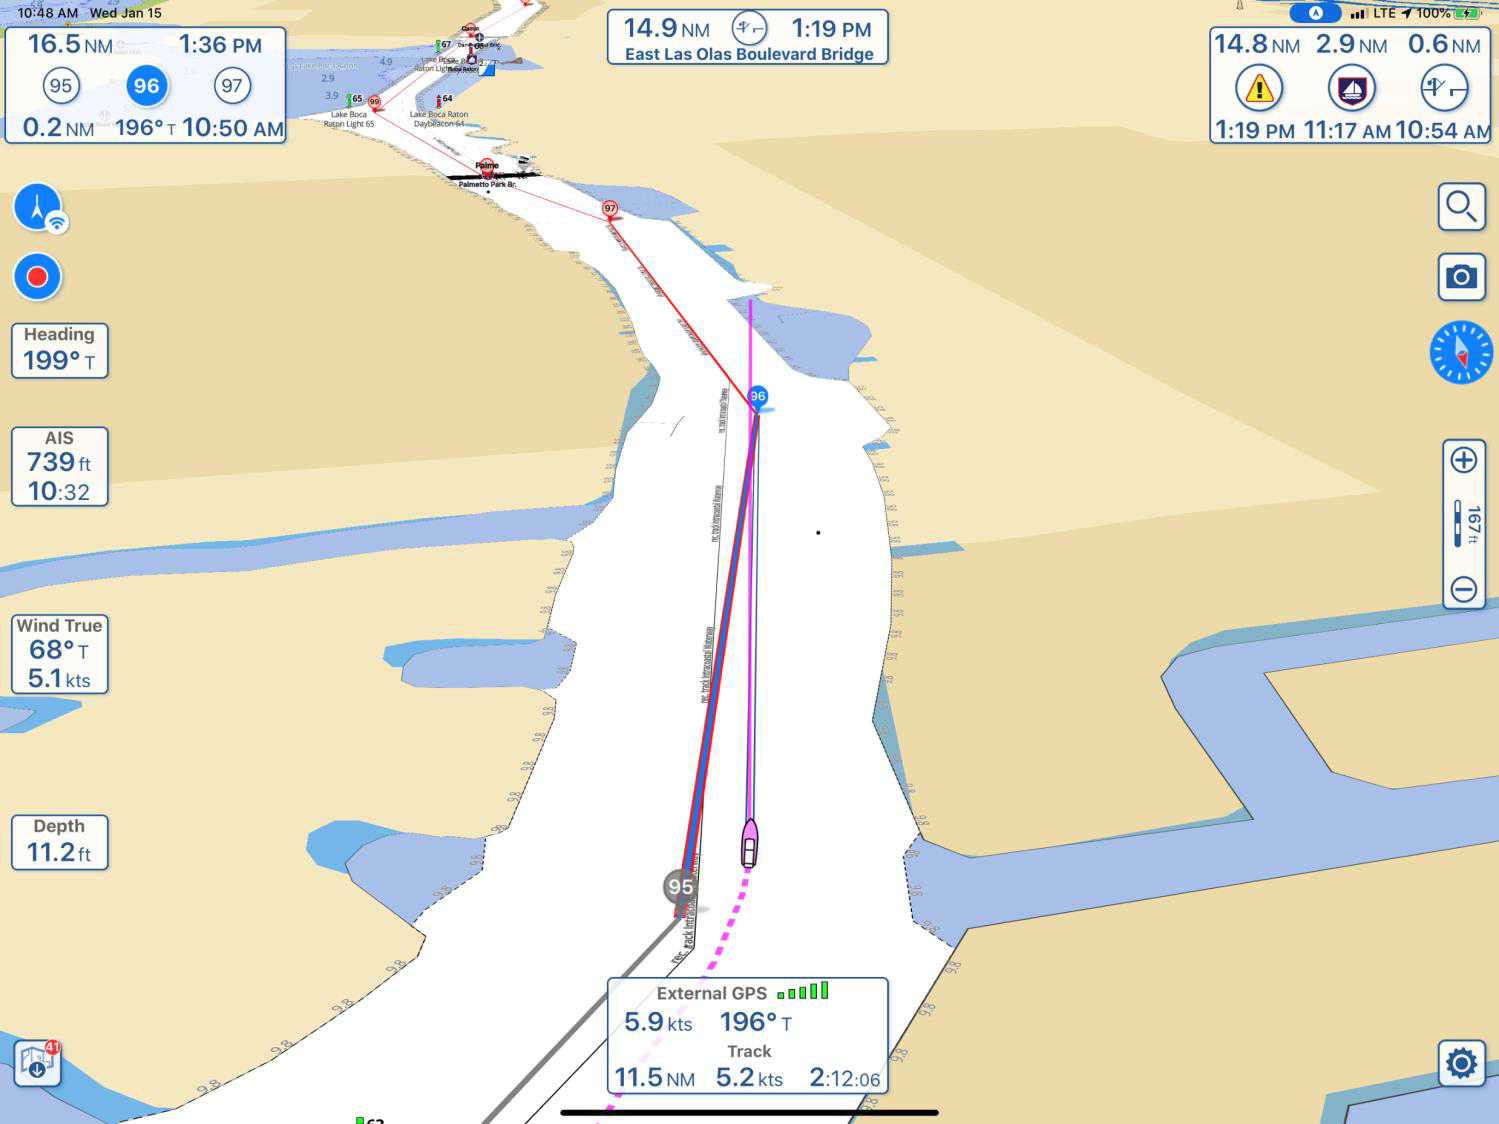
Here’s the navigation screen from Aqua Map with the sample route loaded and the boat underway. The view shown is “Perspective” where you can see ahead to the horizon while the close-in area is magnified and shows your boat icon at the bottom of the screen for the maximum view ahead. You can also turn perspective view off permanently in Settings or use a two-finger up and down swish to move between perspective and overhead view.
The route is shown with waypoint number 95 starting at the bottom of the screen. The dotted line is my track and a solid line is draw out from the bow to show the boat’s direction. I do not have the US Army Corps of Engineers (USACE) survey charts displayed in this view, just the base NOAA charts with the white area showing the channel. The use of USACE survey charts was covered in a previous article.
Let’s examine the information boxes displayed, starting at the GPS box at the bottom, going clockwise:
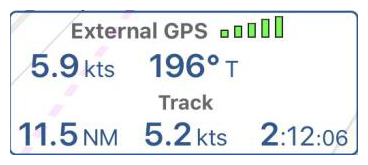
I am using an External GPS as opposed to the internal GPS chip in the iPad Pro. In this case, the GPS feed is from my Vesper XB-8000 AIS 50 channel GPS receiver (more on that later) which is transmitted over WiFi to my iPad Pro. The strength of the GPS signal is shown with the green bars and track information is also displayed when tracking is turned on. My speed over ground (SOG) is 5.9 kts with a heading of 196°T (true, as opposed to magnetic). So far, I’ve covered 11.5NM (nautical miles) at an average speed of 5.2 kts in a time of 2:12:06 (2 hours, 12 minutes, 6 seconds).
If you tap on the chart icon you will be brought to another page for downloading charts. You can see that I have 1 chart update available for downloading.
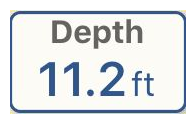
The Vesper XB-8000 is connected to my instruments on my boat through a National Marine Electronics Association (NMEA) interface so Aqua Map has access to all my instruments and displays the depths in real-time. It also attaches a depth reading to each point of my track as a pop-up box when the track is tapped so I can access the depths at my leisure and don’t have to record them as I move along. My wife loves this feature, she was the recorder.
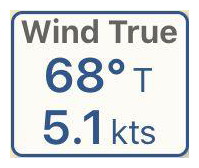
The wind direction (True or Magnetic) and speed are displayed from my instruments.
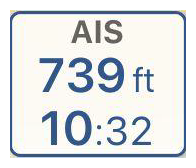
Automatic Ship Identification (AIS) info includes the distance to the nearest ship with AIS and the time of the closest approach. There’s a ton of more information available by tapping on the AIS icon but that’s for another time. Nearby AIS targets are shown on the chart screen.
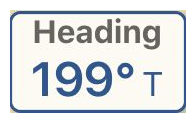
The boat’s heading is shown in true or magnetic format.
The red dot ![]() indicates that a track is actively being recorded. Tapping the red dot gives you a choice of saving the track.
indicates that a track is actively being recorded. Tapping the red dot gives you a choice of saving the track.
The GPS icon with the three arcs
shows I am in “heads up” mode using my GPS track for the direction. Tapping it will give me choices of “Heads up using compass direction” or “North up” display.
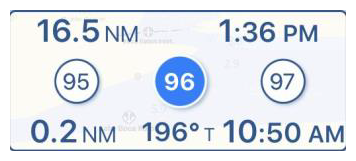
I have a route activated and the box shows the remaining length of the route as 16.5 NM, the ETA of arrival at the final destination as 1:36 PM, the current waypoint headed for as 96 and it’s 0.2 NM away at a heading of 196°T (true). At my current speed, I will arrive at waypoint 96 at 10:50 am.

This infobox is part of Route Explorer and I will cover it in more detail later. You can select any special waypoint, bridge, marina, or alert (hazard) for special attention and it will display in the top middle of the chart with the distance and time of arrival being updated according to boat speed. In my case, I was headed to Ft Lauderdale and was concerned about making the 1:15 opening of the Olas Blvd Bridge. I sped up a little bit and got through on time. It’s handy for keeping track of any particular point of interest such as the place you want to buy fuel at the cheapest price along your route or the night’s destination. The route I entered covers from Hobe Sound to Ft Lauderdale which I can’t make in one day with my sailboat so I’ve used this box to keep track of the ETA of my destination for the night.
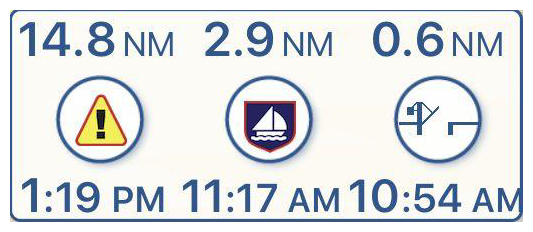
Finally, we come to the Route Explorer infobox. Your route has been analyzed by Route Explorer and the next Alert (hazard), marina, and bridge is shown. It’s 14.8 NM to the next alert with an ETA of 1:19 pm. The next marina is 2.9 NM away with a time of arrival of 11:17 am. The next bridge is 0.6 NM away with a time of arrival of 10:54 am. We are going to discuss this feature in much more detail but first, let’s complete our swing around the display.
![]() This is the search icon. Tap it and it brings up a detailed search menu which will be the subject of another article. The search function has so many capabilities I can’t cover them briefly.
This is the search icon. Tap it and it brings up a detailed search menu which will be the subject of another article. The search function has so many capabilities I can’t cover them briefly.
If you tap here you can take a photo with your iPhone or iPad and the photo will be attached to your track and transfer to other apps that using the KMZ format. A small camera icon will appear beside the point on the track where you took the picture for future access. It’s nice to know the location and times of all those photos you took on your cruise.
Tapping the compass icon will rotate the chart to north up when you’re in heads up mode.
The little ruler ![]() shows the screen distance equaling -- ft with minor divisions for every 50 ft in the two-color bar below the number. Tapping on the icon brings up a ruler you can move around the screen for exact distance measurements. You can get rid of the ruler by tapping the icon again. The + and – will zoom in or out on the screen. You can do the same thing with a two-finger pinch but this technique doesn’t disturb the screen rotation.
shows the screen distance equaling -- ft with minor divisions for every 50 ft in the two-color bar below the number. Tapping on the icon brings up a ruler you can move around the screen for exact distance measurements. You can get rid of the ruler by tapping the icon again. The + and – will zoom in or out on the screen. You can do the same thing with a two-finger pinch but this technique doesn’t disturb the screen rotation.
Tap here ![]() and a Settings menu will come up with lots of choices in configuring Aqua Map. This is another subject for a later date. Aqua Map can be configured to your exact specifications.
and a Settings menu will come up with lots of choices in configuring Aqua Map. This is another subject for a later date. Aqua Map can be configured to your exact specifications.
Now that we’ve completed the screen tour, let’s get into the main subject of the article – the use of Route Explorer on the next page.
The use of Route Explorer in Aqua Map
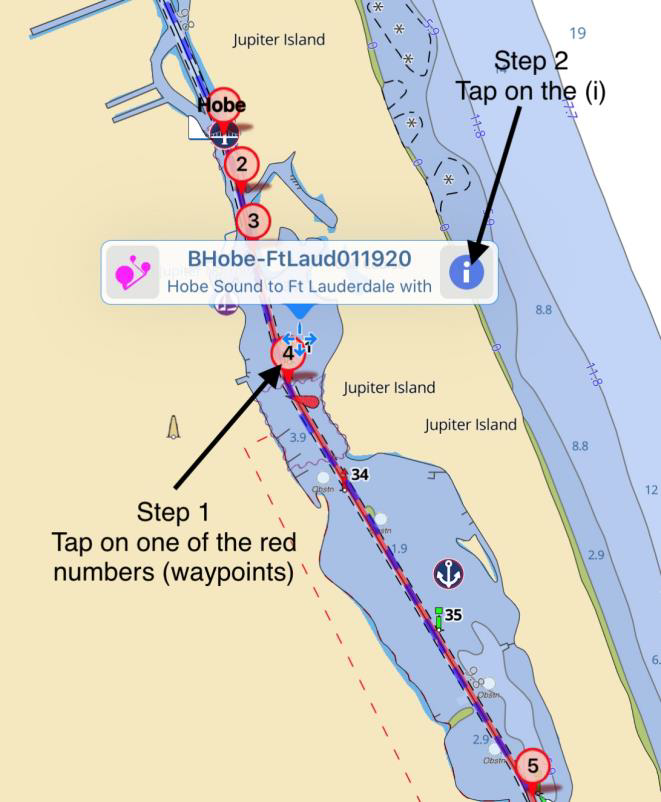
Step 1 – Enter a route. The route has to follow the channel and pass through the middle of every bridge, otherwise, Route Explorer won’t see the bridge. A good example to use is my GPX route from Hobe Sound just south of St Lucie to Ft Lauderdale. It carefully follows the best water route and goes through the center of 30 bridges. It can be downloaded at BHobe-FtLaud01120.
Step 2 – Display the route summary screen by following the steps in the graphic
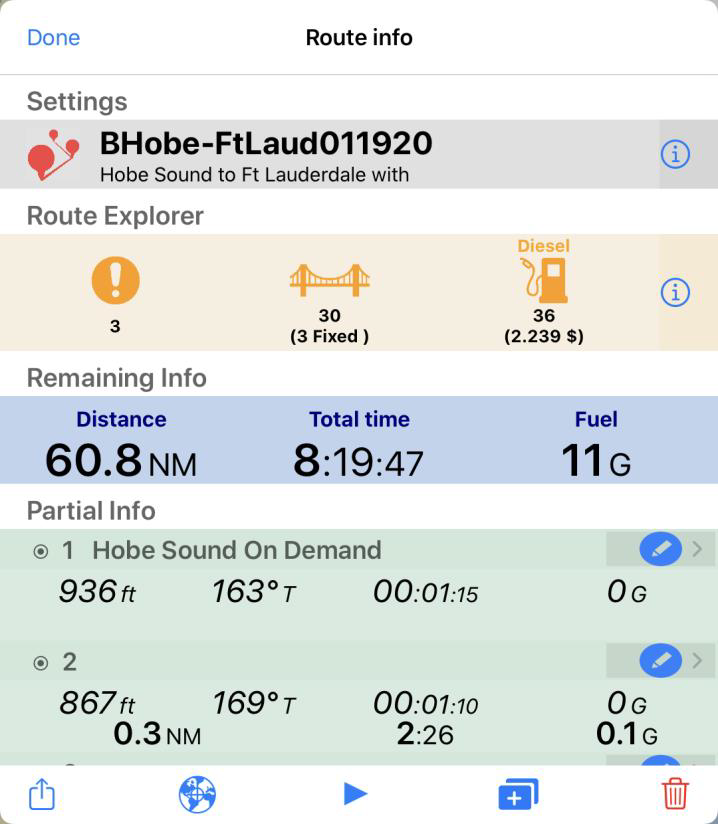
Step 3 – Examine the route.
- The name of the route and a short description appears at the top. If you tap on the (i), you can change the route color.
- Route Explorer. Listed are three alerts (hazards), 30 bridges of which 3 are fixed, and 36 places to buy diesel with the lowest price listed along your route. The hazard list is obtained from Waterway Guide and/or Active Captain, depending upon whether you have one or the other (or both) selected in Settings. I have just Waterway Guide selected so only three alerts are noted.
- Remaining Info. The total distance of the route is 60.8 NM, the total time to travel the route is 8:19:47 based on my cruising speed entered in Settings, and the fuel I will use is 11 gallons (again, based on my boat settings).
- Partial Info. Each waypoint is shown. Looking at waypoint #1, the figures to reaching waypoint #2 are given. Namely, 936 ft away at 163°T (true) with a travel time of 00:01:15 (1 minute and 15 seconds). The same figures are also given for waypoint #2 to reach waypoint #3. Namely, it’s 867 ft away at a heading of 169°T and will take 00:01:10. A running total is given in bold. Namely, by the time you reach waypoint #3, you will have traveled 0.3 NM and taken 2:26 (2 minutes, 26 seconds) and used up 0.1 gallons of diesel. The figures in bold are a running total that will accumulate over the course of the route after each waypoint is reached. The waypoint list can be scrolled with a finger swish (slide your finger up or down the list, it will scroll).

Before we activate the route by tapping on the blue triangle at the bottom of the graphic, let’s examine the Route Explorer information box by tapping on the (i) icon at the far right in the Route Explorer box.
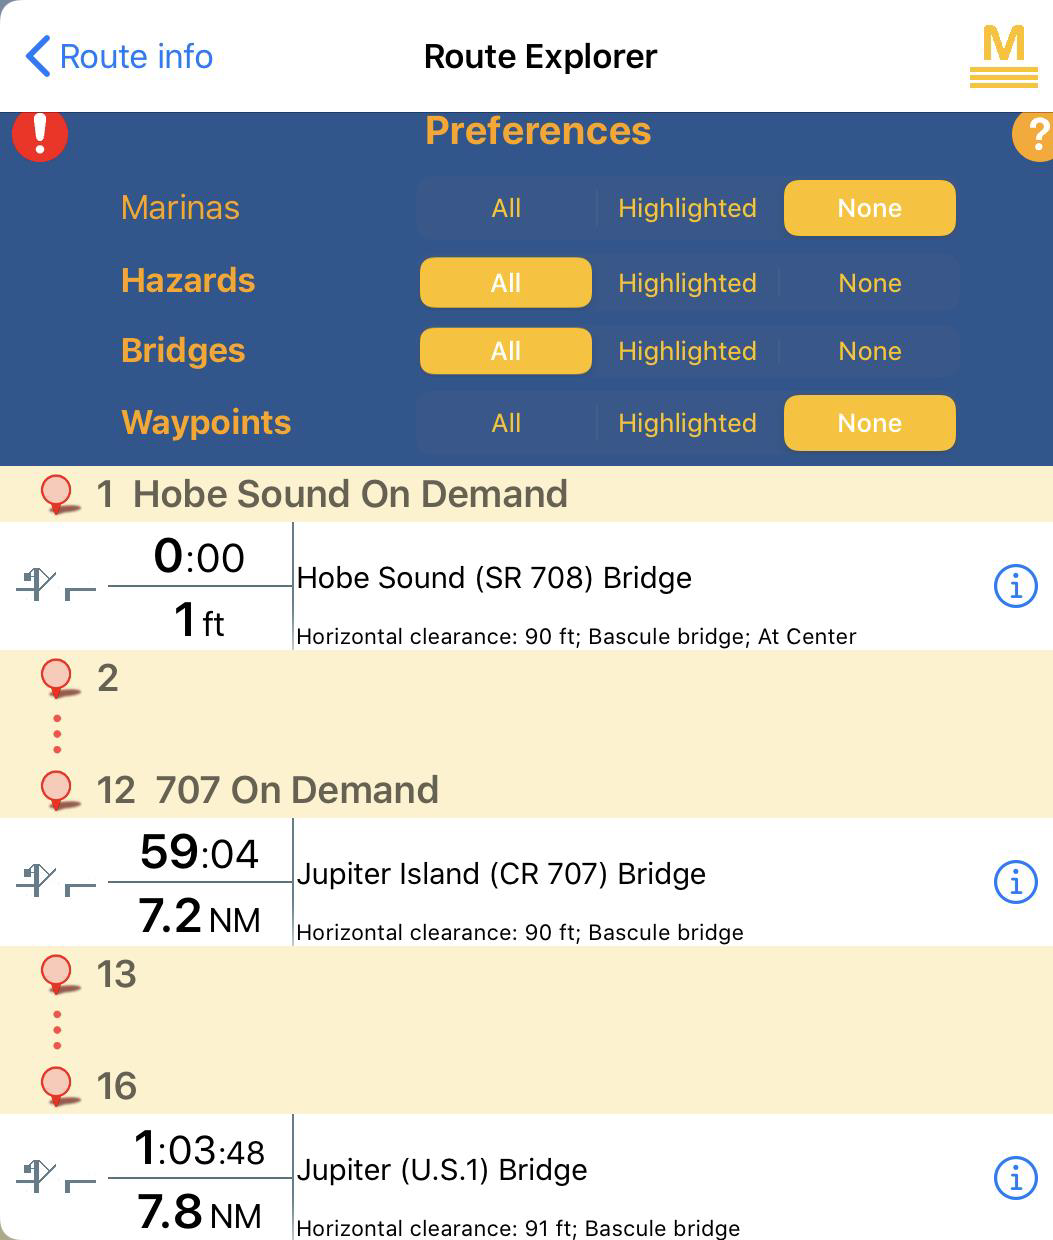
The Route Explorer infobox has choices of what to display. I chose:
- Marinas – None, however, if you want to see which marina has the lowest price of $2.239/gal, then you would tap on “All”. The fuel prices are shown alongside each marina listed and is kept up to date by Waterway Guide editors:
- Hazards – All
- Bridges – All
- Waypoints – None
The graphic shows three bridges listed so far: Hobe Sound SR708, Jupiter Island CR707, and Jupiter US1. Note the “lift” icon denoting a lift bridge vs a fixed bridge.
The time and distance to each bridge are given based on your average boat speed, but when the route is activated, the time changes to the projected arrival time based on your actual boat speed.
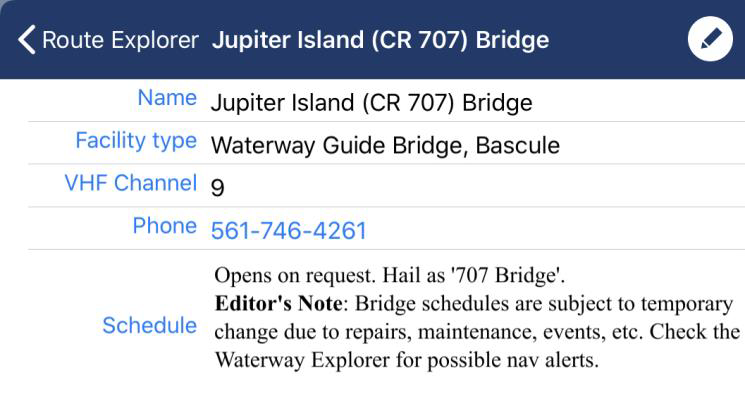
To obtain more information on a bridge, tap on the (i) in the white space at far right next to the bridge name. For example, let’s tap on the (i) for Jupiter Island CR707 bridge and see what comes up.
The name of the bridge is listed, the type of bridge, what VHF channel to use, the phone number of the operator of the bridge and the opening schedule with the bridge name to use in hailing the bridge.
This is a handy reference for an area with many bridges. The bridge schedules and fuel prices are kept up to date by Waterway Guide editors. I keep the alerts (hazard) info up to date myself.

We have one more thing to do before activating the route. Remember the infobox at the top of the display? I wanted to keep track of that particular bridge throughout my trip so I used a feature in Route Explorer that allows the user to select a special marina, waypoint, hazard, or bridge to be highlighted and placed at the top of the navigation screen. The bridge was also my destination for the day (the route continued southward) and I wanted to keep abreast of my projected arrival time. How did I get that status box to appear? Let’s see.
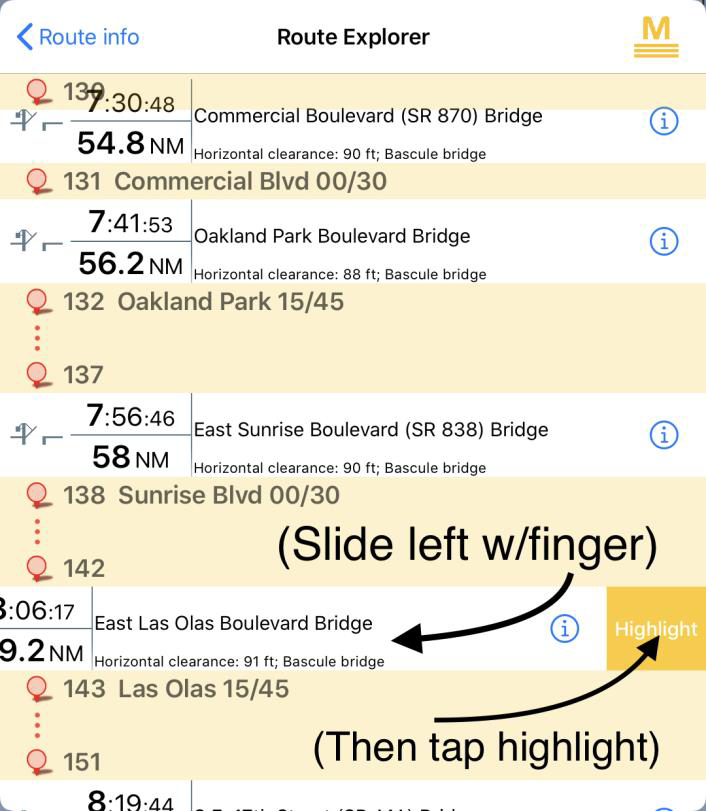
Step 1: Scroll through the bridge listing in Route Explorer until you come to the bridge (or anything else) you want a special infobox for.
Step 2: Place your finger on the bridge of interest and slide it to the left (see graphic)
Step 3: a box labeled “Highlight” will appear. Tap “Highlight”
You now have an infobox at the top of the navigation screen giving you continuous updates on the distance and ETA to the bridge once the route is activated. The infobox can be changed at any time, even while navigating a route. The Route Explorer infobox at the top right of the navigation screen is unaffected. It will continue to show the next bridge, hazard, or marina distance and ETA as you proceed on your route.
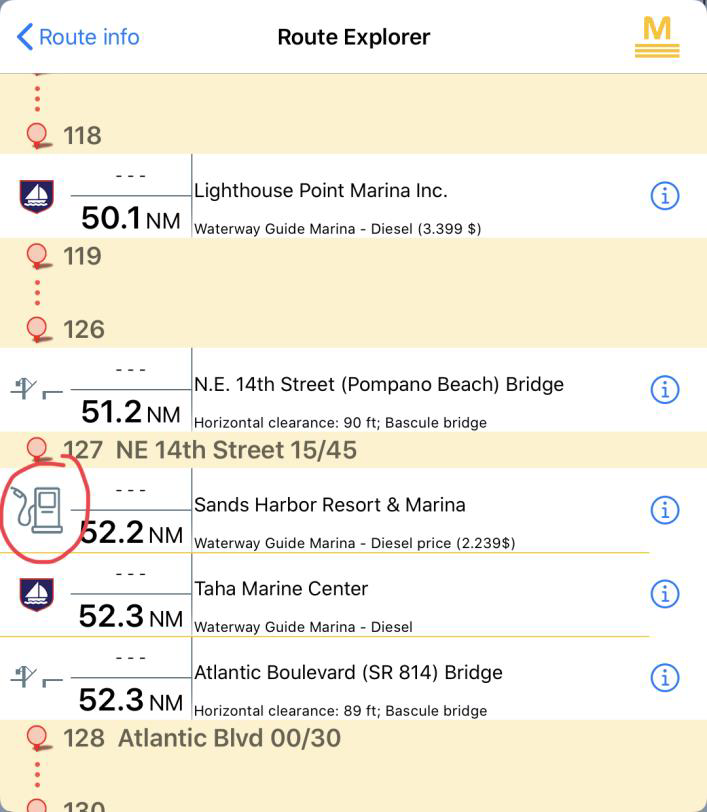
Let’s do another example. Suppose you wanted to keep track of your arrival time to that bargain fuel price listed in Route Explorer so you’ll be sure to stop and not pass it by inadvertently. Let’s change the marina display from “None” to “All” so we can see prices. The lowest fuel price will be marked with a fuel icon (circled in red that cycles between the fuel icon and the marina icon) along with the $2.239/gal price to the right. You’ll notice that the Lighthouse Point Marina fuel price is also listed but at $3.399/gal. Just as in highlighting a bridge, you place your finger on “Sands Harbor” and slide to the left and “Highlight” will uncover. Tap “Highlight” and the special info box will appear at the top of your navigation screen. Now you will be sure not to miss that special price of $2.239/gal! If you tap on the marina name, a chart will be displayed with the marina centered on the screen. If you tap on the (i), a detailed marina information box will display with phone numbers, reviews, and much more.

With the entering of a route and the preparation of Route Explorer as described above, we can now activate the route. If the route is already displayed on the screen, just tap on one of the waypoints (red dot with a number inside) and then the at the far right (I drew a red circle around the i to be tapped). The Route Info screen displays as shown below. If the route is not already displayed, tap on the spyglass at the upper right on the screen and look under the Routes tab for BHobe-FtLauderdale011120 and tap on that to bring up a chart with the route displayed, then tap on one of the waypoints as described above (red dot with a number inside).
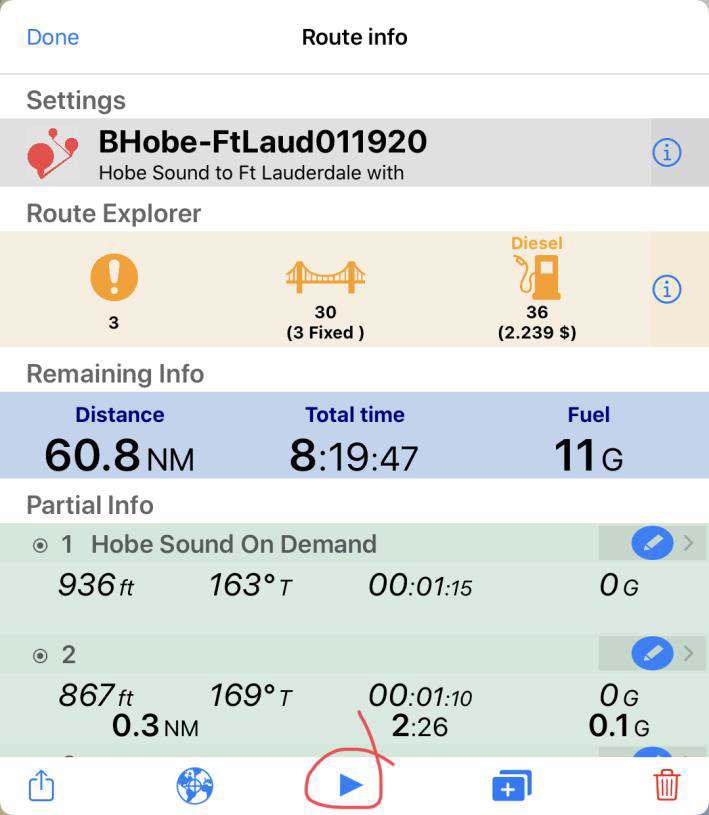
To activate the route, just tap on the blue triangle at the bottom of the infobox, it’s circled in red. At this point, Aqua Map will keep track of your position relative to all the waypoints, marinas, alerts (hazards) and any special items you highlight such as a bridge or a fuel stop. With all the power we have today at our fingertips with smartphones or tablets, let the devices keep track of the details, allowing you to pay better attention to what’s ahead of you and enjoy your well-deserved trip on our waterways. Even with covering Route Explorer, we’ve only scratched the surface of what Aqua Map is capable of. There is much more power available to help you along your way but that’s a subject for another article. In the meantime, enjoy worrying less about making bridges on-time.
by Robert Sherer aka Bob423


