Signing up for a GEC Account offers you several benefits:
- Share all your Aqua Map purchases among 5 devices (Apple and Android).
- Have a secure place to store your markers, tracks, and routes. Note: This is not a typical cloud service where data on the device is automatically saved or synced. You need to specifically save your data to your GEC Account archive using the sharing function. Saving the same object multiple times will create multiple copies of the file and will not replace existing ones.
- Participate in the Aqua Map community through the Live Sharing feature.
- Easily share your data with the entire Aqua Map community using the Public Folder feature.
GEC Account within the App
Register and Login
You can access the GEC Account login page from the general Settings page.

Here, you can login using your GEC Account credentials. If you're not already a GEC Account user, you can register directly from this page using the "Register" button or opt for registration through your Google, Facebook, or Apple accounts.
You can also register via your web browser on our website (www.aquamap.app). Find more details in the "GEC Account on the Web" section below.
Once logged in, you'll be directed to your "Profile" page. Further information on this is provided in the following paragraph.
Once you login to your GEC Account, all your Aqua Map purchases are automatically shared across all your devices (up to 5 devices). Additionally, you can use the GEC Account as a storage space for your essential data, including markers, tracks, routes, and photos.
Save data into
To save your data to the GEC Account, you should use the sharing feature and select the "GEC Account" as the destination for your sharing. To do this, you must be logged with your GEC Account.

Import data from
From the Search page, selecting the "User data" tab and then the "Download from your GEC Account" option.
Once chosen, a browser window displaying your GEC Account page will open.

To import a file, simply select it from the list (you'll see a preview in the map panel) and then click the import button (refer to the image below, highlighted button at the top-left).

Profile
From the Settings page, select the GEC Account option to access your Profile details:
 Here you can:
- Logout using the top-right button.
- Update and change your account information such as Name and Email (please note that you cannot change your Username).
- Request to Delete your GEC Account. This will initiate an email confirmation process. Once the request is confirmed, the deletion will be executed and it will be permanent (cannot be restored).
By tapping on the "Subscriptions and devices" tab, you'll have the opportunity to view all the purchases currently stored in your GEC Account:

On this page, you can also redeem any Redeem code that you may have.
Finally tapping on the "Change password" tab, you could change your GEC Account password:

GEC Account within the Website
Register and Login
The simplest way to register to the GEC Account is using our website using the Login button in the top right corner of the home page.
Your archive
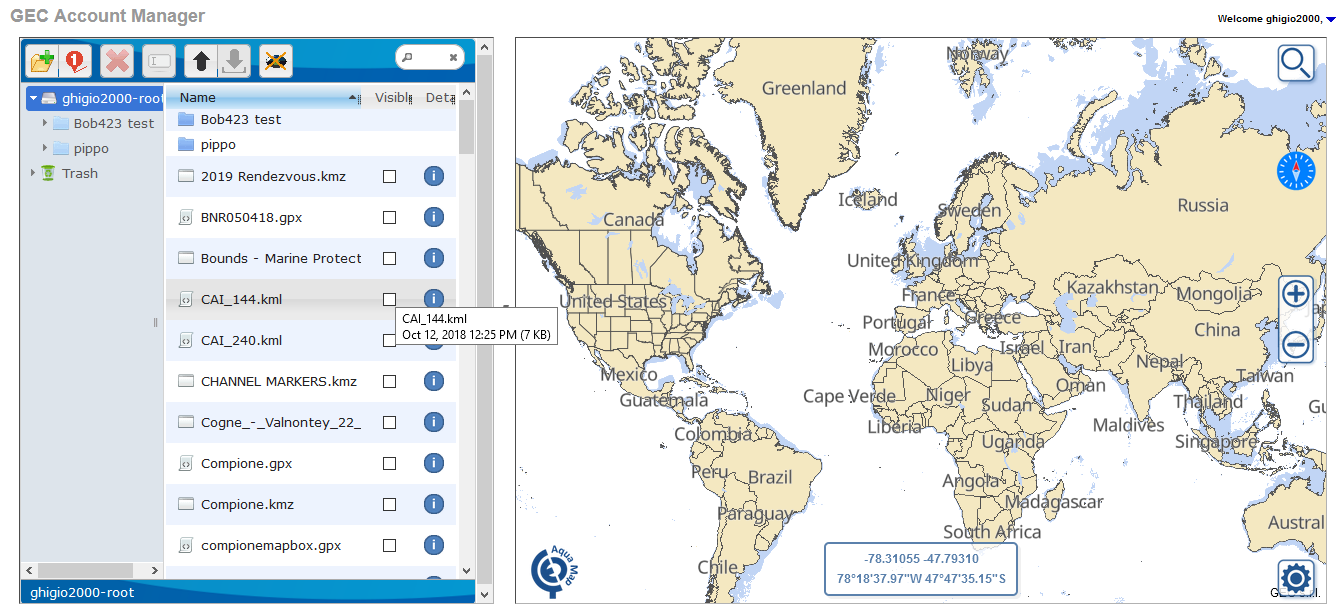
Once logged-in, your Archive will be displayed in the Chsrt Viewer page of the website (file manager in the left panel of the viewer, screenshot below)

From the File Manager (left side panel) you can:
- Select a file or multiple files (using SHIFT or CTRL for multiple selections). The selection can be done by clicking on the filename (it will be highlighted with a blue background).
Once selected you can move them within the folders and subfolders with a simple drag & drop.  Create a new folder/subfolder in your archive.
 Create a new Route/Itinerary in your archive.
 Delete selected files from your archive (move into the trash folder).
 Rename selected file (changing file extension is not allowed) or folder .
 Press the arrow-up icon to upload a new file (KMZ, KML or GPX formats only) to your archive. You can also drag & drop one or more files from your PC to the file list.
Select one or more files by clicking on its filename, once selected press the arrow-down icon to download. If more than one file is selected then a zip is created to download including all selected files Hide all files currently displayed on the map
 Click the checkbox to display/hide files on the map.
 Press the "i" (or double click on the filename) to show details of a file. This will remove all currently displayed files from the map and show this one only.
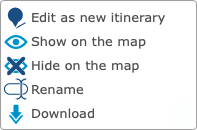
- Right-clicking on selected files in the left panel will open a context menu with a subset of available commands:

Note that the first command in this menu ("Edit as new itinerary") allows you to start a new itinerary by copying all objects from the selected files. This is how you modify an existing itinerary file. See below for more details in the next paragraphs.
From the Map (right side panel) you can:
- Zoom and pan the worldwide map.
 Search a location worldwide.
 Change map settings.
Public Folder
In your GEC Account root directory (left column), you'll discover a unique folder called "public." This folder is system-generated and cannot be altered or removed. It serves as the destination for uploading files you want to share with the Aqua Map community. While all files in your GEC Account are private and inaccessible to others, those in the "public" folder will be openly accessible to all members of the Aqua Map community. For further information, refer to the dedicated Public Folder page.
Recall your experience
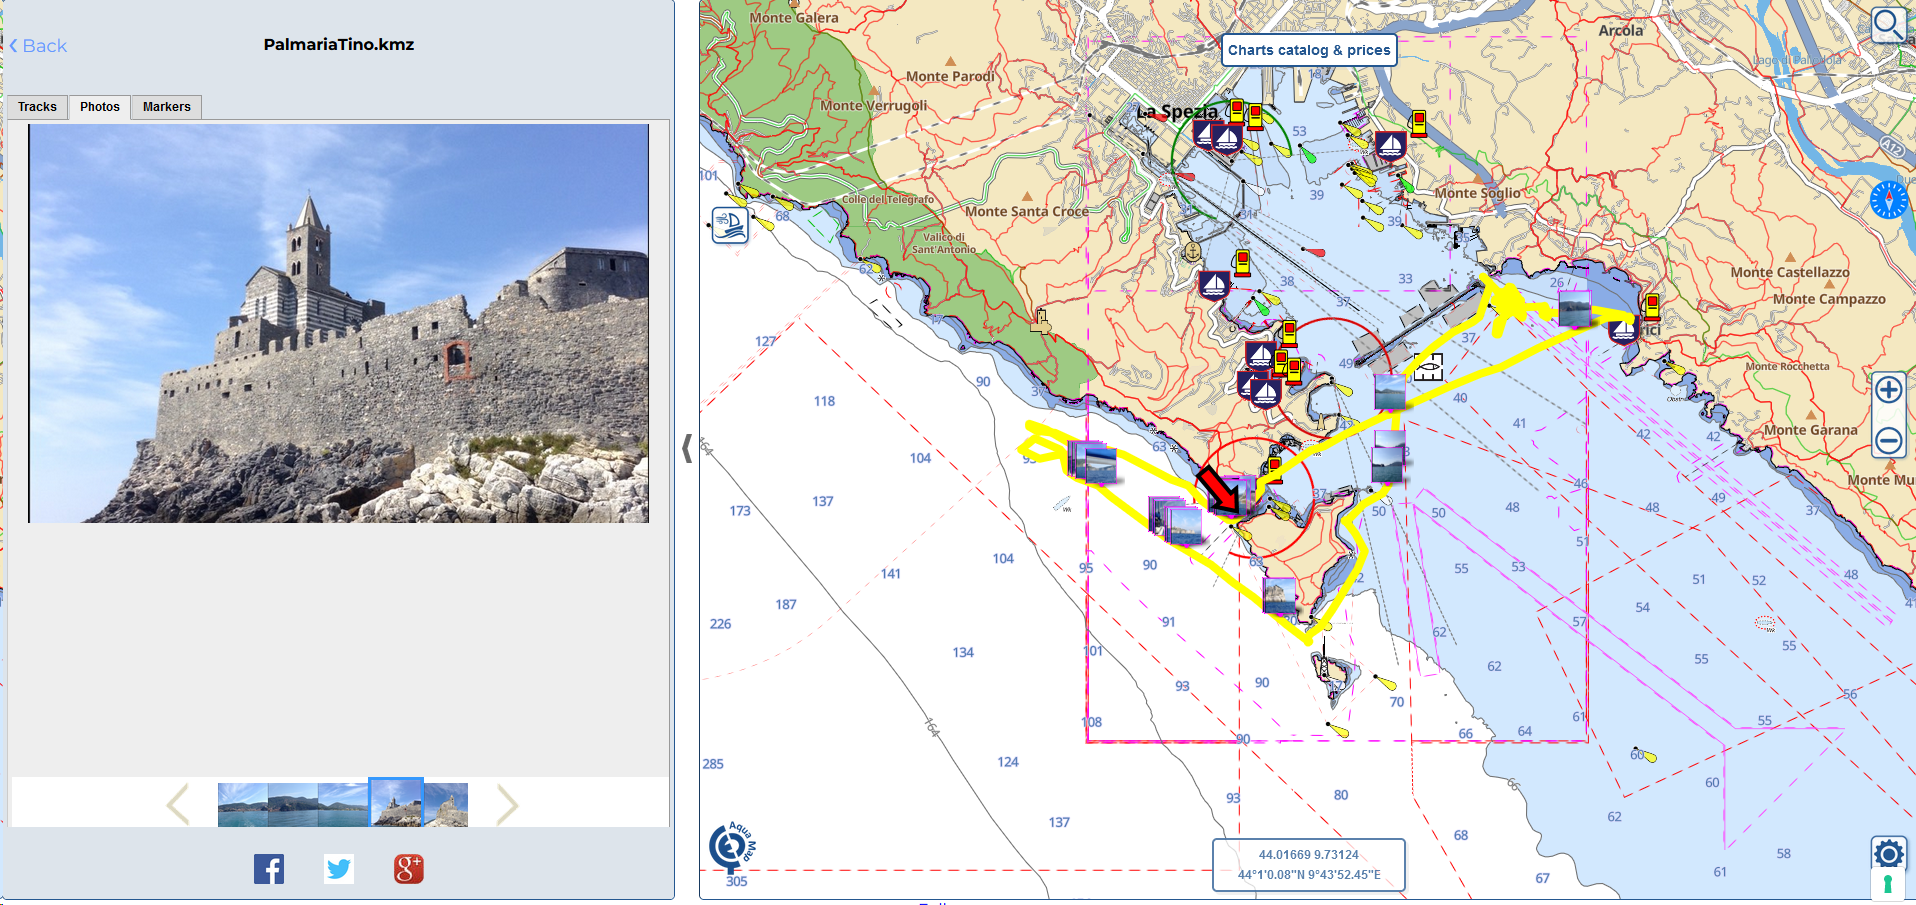
When you double-click one of your archived files, the system will overlay it on the map.
From here, you can access all the information contained within the file, including track statistics, markers, photos, and routes (if available).

You will also have the opportunity to view depth (when available) and speed graphs, allowing you to relive the entire experience by recalling all the pictures and their locations from when you were on the water.
Create a new Itinerary or edit an existing one
Below, we'll outline the tools available for the purpose:
Creating a new Itinerary involves gathering Tracks, Markers, Routes, and Photos into a single file (GPX, KML, or KMZ). The system will generate this file and archive it in your User Area with the name you've defined (automatic numbering will be applied in case of duplication).
Once the file is saved, you can download it, share it on major social networks, or load it into your Aqua Map (see "Import data from" above).

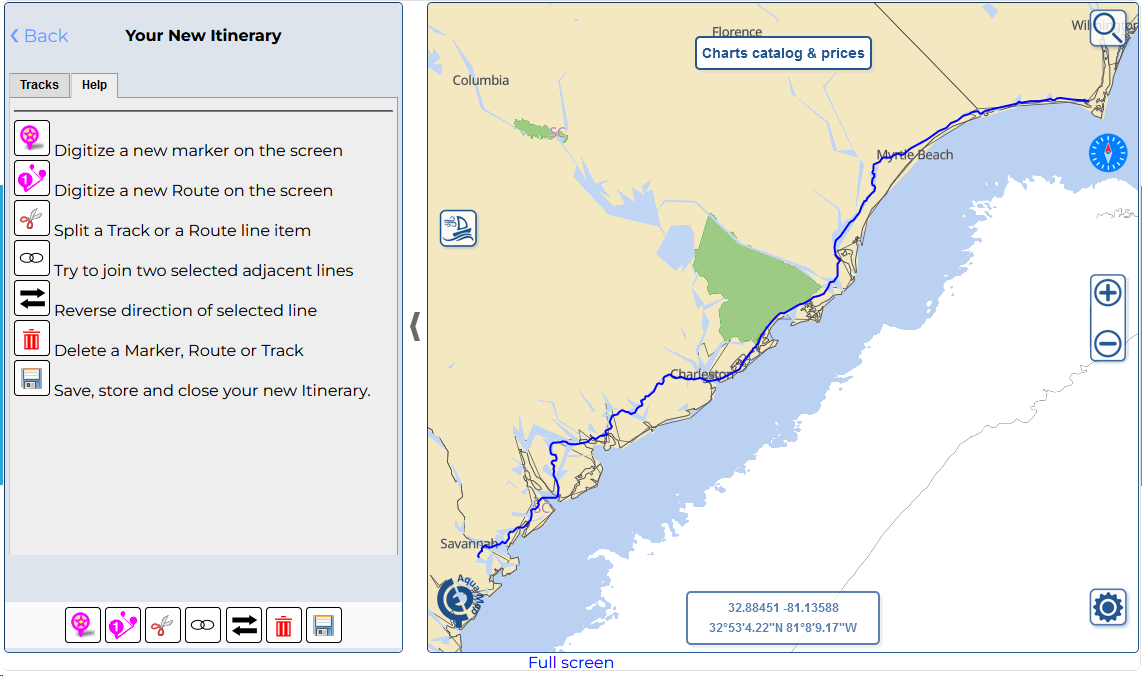
On the chartviewer, you can perform the below activities (once a button is pressed it will turn to "orange" ![]() and the function will be active until you press it again or press another button):
and the function will be active until you press it again or press another button):
- First of all, if you want to edit the geometry of your object, simply click on it and you will be able to drag, remove and add new points to your track/route.
 Add a new marker on the screen. After adding a new Marker you will be able to assign a name, a description, change the icon and add a photo. You can change them anytime until you will save the current new Itinerary.
 Digitize a new route on the screen. Click on the map to place the next Route's waypoint (this will be represented by an icon
  showing a progressive numbering, the distance from the previous waypoint, the total distance and the compass angle from the previous waypoint). A popup dialog will assist you while digitizing the route.
This dialog box helps you undo the last point, redo the last undo, save, or cancel the digitization. Once you've added the new tour, you can give it a name, description, and color. You can change these anytime until you save the current new itinerary. Pressing this icon will activate the "split" functionality. This lets you split a linear feature (like a track or route) into two separate objects. First, select the feature you want to split, then click on the position where you want to split it.
 Pressing this icon allows you to join two or more line objects together (they must belong to the same type: route or track).
 Reverse lines. Once this tool is active, select any line to reverse the order of its points.
 Pressing this button lets you delete any object from your new itinerary.
NOTE: There's no undo function, so be careful while removing objects. Save, store in your archive, and close the editing session of your itinerary. Type the name of the file (if there's a duplication, a progressive number will be added) and choose the format GPX and/or KMZ/KML you want to save.
In general, a new itinerary can only be modified until you save it. You can modify the name and description of all its items, but remember that duplicate names are not allowed for items of the same type (marker, route, track) within the same file. So, the system might automatically rename them when you propose a duplicated name.
REMINDER: to modify an existing Route/Itinerary file you can select it from the file manager, right click, and select "Edit as new itinerary" from the context menu.


